Introduction
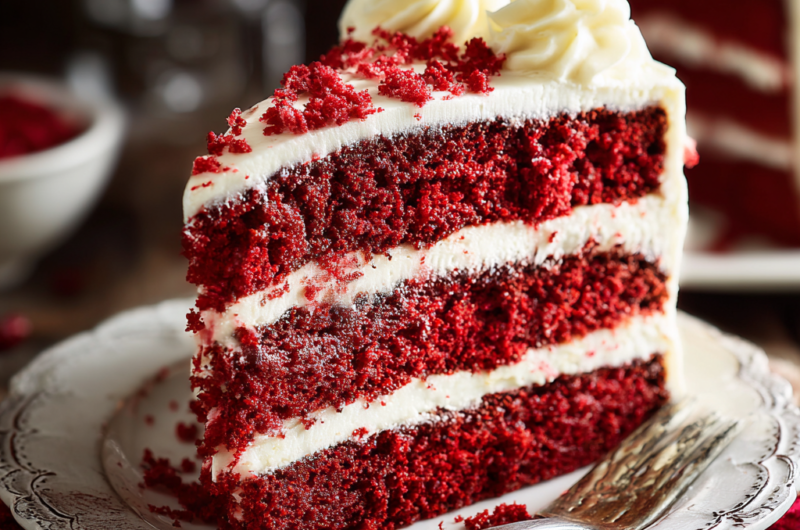
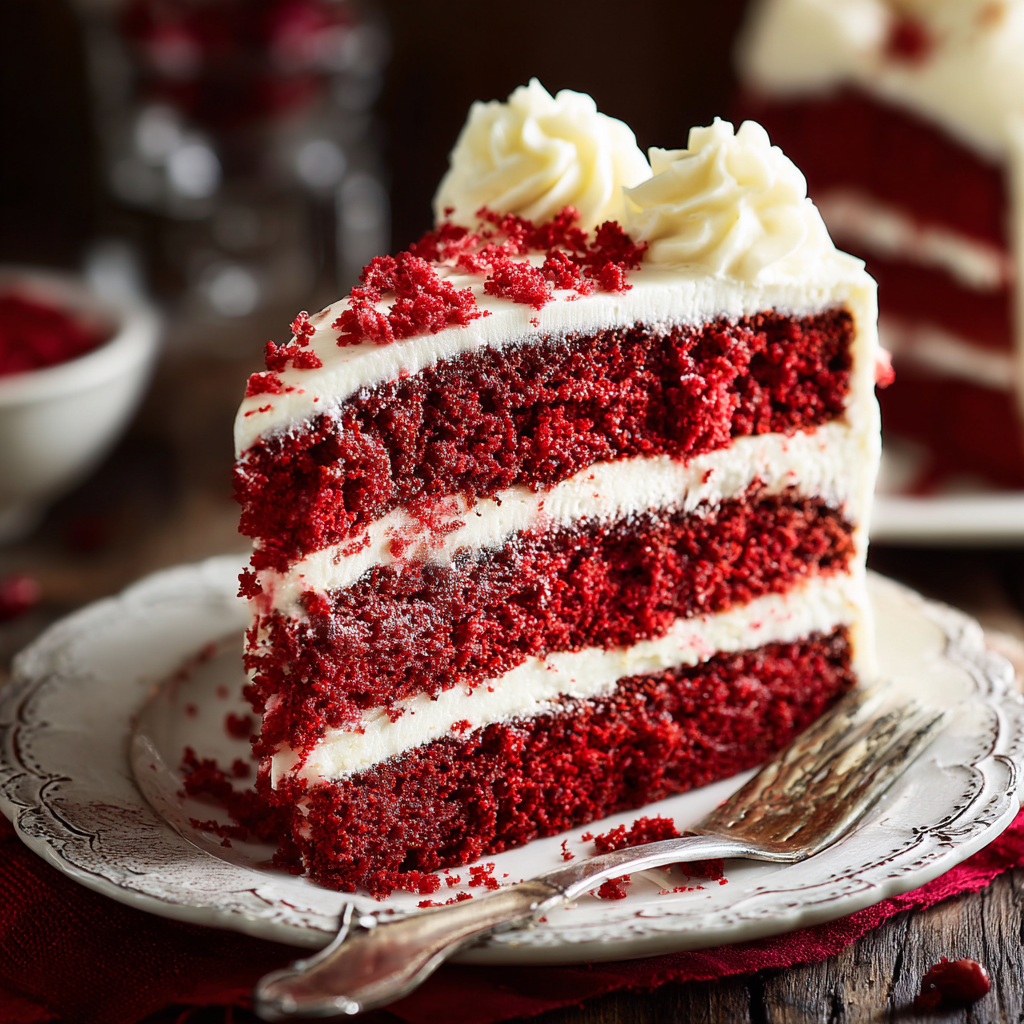
Red Velvet Cake is a timeless classic, renowned for its striking burgundy hue and subtle chocolate flavor. Its origins are shrouded in mystery, but it's beloved in many cultures as a celebratory dessert. The velvety crumb and cream cheese frosting make it a standout treat for any occasion.
While it may seem intimidating to tackle at home, this cake is surprisingly approachable for both novice and experienced bakers. The unique combination of ingredients provides rich flavor and a stunning visual appeal. With a little patience and attention to detail, you can create a beautiful Red Velvet Cake that impresses every palate.
Ingredients
- 2 ½ cups all-purpose flour
This forms the structure of the cake and provides the base for its soft, tender crumb. Using all-purpose flour strikes a balance in texture, giving the cake its classic fluffiness. - 1 ½ cups granulated sugar
Sugar adds sweetness and moisture to the cake. It helps with the cake's rise by creating air pockets when creamed with butter, contributing to a light texture. - 1 teaspoon baking soda
Baking soda is a leavening agent that reacts with the acidic ingredients, helping the cake to rise and achieve that signature lightness. - 1 teaspoon baking powder
This provides an additional source of leavening, ensuring the cake rises properly and remains fluffy. - 1 teaspoon salt
Salt enhances the overall flavor of the cake, balancing the sweetness and deepening the chocolate notes. - 1 cup vegetable oil
Oil keeps the cake moist and adds richness without weighing it down, unlike butter which typically gives a firmer structure. - 1 cup buttermilk
The acidity in buttermilk activates the baking soda, contributing to the cake’s rise and giving it a tender crumb. - 2 large eggs
Eggs act as a binding agent, providing structure and stability to the cake while also contributing to its richness. - 2 tablespoons red food coloring
The food coloring provides the cake’s signature color. It’s crucial to use the right amount for that vibrant hue that’s visually appealing. - 1 teaspoon vanilla extract
Vanilla adds a depth of flavor, harmonizing the sweet and chocolate overtones in the cake. - 1 teaspoon distilled white vinegar
The vinegar reacts with the baking soda to enhance leavening, giving the cake its fluffy texture while also enhancing the color. - 8 ounces cream cheese
Cream cheese is the base for the frosting, providing a tangy flavor and creamy texture that beautifully contrasts the sweetness of the cake. - 4 cups powdered sugar
Powdered sugar sweetens the frosting and helps achieve the smooth texture needed for spreading. - ½ cup unsalted butter
Butter adds richness to the frosting and helps achieve a creamy consistency, making it easy to spread over the cake. - 2 teaspoons milk
Milk helps to thin the frosting to the desired spreadable consistency, ensuring it doesn’t overpower the cake.
Directions & Preparation
Step 1: Preheat the oven to 350°F (175°C) and prepare the pans.
Preheating ensures that the cake bakes evenly from the moment it goes in the oven. Prepare your pans by greasing and flouring them or lining them with parchment. This step is crucial to prevent the cake from sticking.
Step 2: In a large bowl, sift together the flour, cocoa powder, baking soda, baking powder, and salt.
Sifting aerates the dry ingredients, breaking up any lumps and ensuring a light texture. Combining the dry ingredients first helps distribute them evenly throughout the batter, preventing clumps.
Step 3: In another large bowl, mix the sugar and vegetable oil until well combined.
Creaming sugar with oil is essential to incorporate air into the mixture. This will create a light base that helps the cake to rise. Remember to mix thoroughly for even sweetness.
Step 4: Add in the eggs one at a time, mixing well after each addition, then stir in the buttermilk, red food coloring, vanilla extract, and vinegar.
Incorporating eggs one at a time ensures they are well mixed, promoting an even structure. The addition of wet ingredients enhances moisture and flavor while activating the leaveners.
Step 5: Gradually add the flour mixture to the wet ingredients, mixing just until combined.
Overmixing can lead to a tough cake. Mixing until just combined helps maintain the tender crumb characteristic of a Red Velvet Cake.
Step 6: Divide the batter evenly between the prepared cake pans.
Using equal portions of batter ensures that your layers bake evenly, allowing for a consistent stacking and a visually appealing cake.
Step 7: Bake in preheated oven for 25-30 minutes or until a toothpick inserted in the center comes out clean.
Baking times can vary based on your oven. Start checking at the 25-minute mark, as you want to ensure the cake is perfectly baked without being overcooked.
Step 8: Allow the cakes to cool in the pans for 10 minutes before transferring them to wire racks to cool completely.
Cooling in the pans initially prevents the cake from crumbling. Once they’re firm enough, transferring them to wire racks allows for even cooling, essential for proper frosting.
Step 9: While the cakes are cooling, prepare the cream cheese frosting by beating together cream cheese, butter, and powdered sugar until smooth.
The smoothness of the frosting is crucial for easy spreading. Ensure the cream cheese and butter are at room temperature for the best results.
Step 10: Add milk to achieve the desired consistency for the frosting.
Adjusting the consistency of your frosting ensures it spreads nicely without dripping off the sides of the cake. Aim for a creamy but not too runny texture.
Step 11: Frost the top of one cake layer, place the second layer on top, and frost the top and sides of the cake.
Layering the cake properly and applying an even layer of frosting enhances presentation and flavor in each bite. Ensure each layer has ample frosting for balance.
Step 12: Decorate as desired, then slice and enjoy your homemade Red Velvet Cake.
Finishing touches add personalized flair to your cake. Serve it with love, and enjoy the delightful blend of flavors and textures with your friends and family.

The Flavor Balance of a Red Velvet Cake
The charm of Red Velvet Cake lies in its unique flavor profile, which balances sweet and subtle notes of cocoa. The acidity from buttermilk and vinegar enhances this interplay, ensuring the cake remains moist. The cream cheese frosting adds a tangy contrast that elevates each bite, making it not just a treat for the eyes, but also for the palate.
Achieving the Perfect Red Color
The iconic color of Red Velvet Cake comes primarily from the food coloring, which brightens the cocoa and creates that vivid appearance. Using high-quality gel food coloring not only provides a richer hue but also minimizes the alteration of the cake's taste. It’s all about enhancing the visual appeal without overwhelming the delicate flavor.
Textural Elements: Cake vs. Frosting
The interplay between the soft, velvety cake and the creamy, tangy frosting creates a delightful textural contrast. While the cake should be light and fluffy, the frosting adds richness and depth, creating a balanced dessert. Choosing the right consistency for the frosting is key—it should be spreadable without losing its form.
FAQs
What can I do if my cake comes out too dense?
If your cake is dense, you may have overmixed the batter or incorrectly measured the flour. Be gentle when combining the wet and dry ingredients.
Can I use different oils in place of vegetable oil?
Yes, you can use oils like canola or sunflower, but avoid strong-flavored oils. They may alter the cake's taste.
Why did my cream cheese frosting turn out runny?
Runny frosting can result from overbeating or using butter that's too soft. Try chilling the frosting briefly to firm it up.
How can I adjust this recipe for a two-layer round cake?
If making a two-layer round cake, halve the recipe, or ensure your baking pans are large enough to accommodate all the batter.
What should I do if the cake is overly sweet?
If the cake tastes overly sweet, consider balancing it with tangier frosting or garnishes like fresh fruits to cut through the sweetness.
Why is my cake too thick?
A too-thick batter may indicate insufficient liquid or overdevelopment of gluten. Ensure precise measurements and gentle mixing.
Conclusion
Creating a Red Velvet Cake is not just about following a recipe, but also about embracing the process. The aromas that fill your kitchen while baking and the joy of serving a slice to loved ones are truly rewarding.
With its luxurious color and flavor, this cake is bound to make any occasion feel special. Don’t hesitate to experiment and make it your own—it’s a delicious canvas for creativity.
Recipe Card
Crafting a Memorable Red Velvet Cake Experience
Ingredients
Method
- Preheat the oven to 350°F (175°C) and prepare the pans.
- In a large bowl, sift together the flour, cocoa powder, baking soda, baking powder, and salt.
- In another large bowl, mix the sugar and vegetable oil until well combined.
- Add in the eggs one at a time, mixing well after each addition, then stir in the buttermilk, red food coloring, vanilla extract, and vinegar.
- Gradually add the flour mixture to the wet ingredients, mixing just until combined.
- Divide the batter evenly between the prepared cake pans.
- Bake in preheated oven for 25-30 minutes or until a toothpick inserted in the center comes out clean.
- Allow the cakes to cool in the pans for 10 minutes before transferring them to wire racks to cool completely.
- While the cakes are cooling, prepare the cream cheese frosting by beating together cream cheese, butter, and powdered sugar until smooth.
- Add milk to achieve the desired consistency for the frosting.
- Frost the top of one cake layer, place the second layer on top, and frost the top and sides of the cake.
- Decorate as desired, then slice and enjoy your homemade Red Velvet Cake.
Notes
Additional serving suggestions: pair with a crisp salad, garlic bread, or roasted seasonal vegetables for balance.
For make-ahead, prep components separately and assemble just before heating to preserve texture.
Taste and adjust with acid (lemon/vinegar) and salt right at the end to wake up flavors.