Introduction
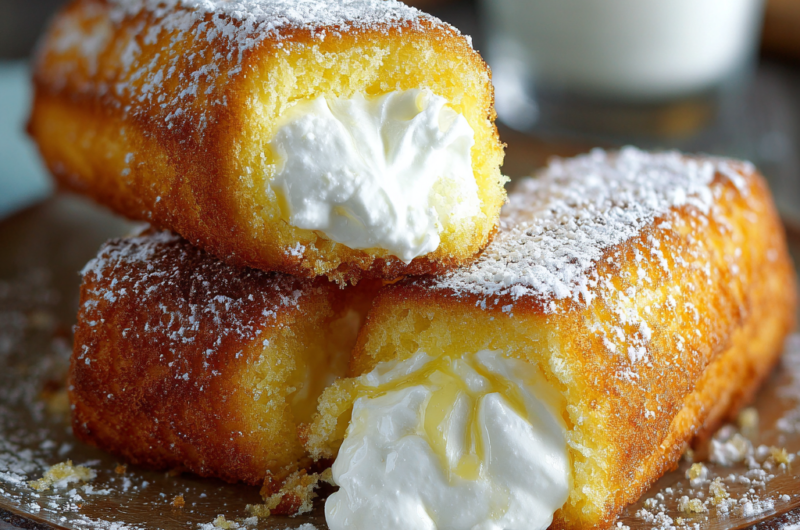
Homemade Twinkies are a nostalgic treat that can be surprisingly simple to make from scratch. These soft, sponge-like cakes, filled with a fluffy vanilla cream, are a favorite among snack lovers. By creating your own version, you can control the ingredients, resulting in a fresher and more flavorful experience than store-bought alternatives.
While the original Twinkies often contained preservatives and artificial flavors, your homemade versions can shine with pure, natural ingredients. This not only elevates the taste but also allows for creative variations. Whether you're baking for a party or simply indulging your sweet tooth, these Twinkies will certainly impress.
Ingredients
- 1 ½ cups all-purpose flour
This is the main structure of the cake, providing the necessary gluten that gives Twinkies their characteristic texture. - 1 cup granulated sugar
Sugar adds sweetness and moisture, contributing to the soft crumb and flavor of the sponge. - 1 ½ teaspoons baking powder
This leavening agent helps the cake rise, creating a light and airy texture. - ½ teaspoon salt
Salt enhances the flavor, balancing the sweetness and improving overall taste. - ½ cup unsalted butter, softened
Butter adds richness and moisture, influencing both flavor and texture. - 3 large eggs
Eggs provide essential structure, moisture, and help emulsify the batter, contributing to a tender crumb. - 1 teaspoon vanilla extract
Vanilla extract adds a warm, aromatic depth of flavor that is essential for the classic Twinkie taste. - 1 cup heavy cream
This will be whipped and folded into the filling, giving it a luscious and rich texture. - 1 cup powdered sugar
Powdered sugar sweetens the filling while helping to stabilize the whipped cream for the perfect creamy texture. - 1 teaspoon vanilla extract (for filling)
This enhances the flavor of the cream, uniting it with the cake in a delightful balance.
Directions & Preparation
Step 1: Preheat your oven to 350°F (175°C) and prepare a Twinkie pan.
Preheating ensures your cakes rise properly and develop the right texture. A Twinkie pan, with its distinctive shape, is preferred for achieving the traditional looks, but if you don't have one, you can use cupcake pans with a bit of creativity.
Step 2: In a large mixing bowl, whisk together the flour, sugar, baking powder, and salt.
Combining dry ingredients first helps to evenly distribute the leavening agents and sugar throughout the mixture, which is crucial for a uniform rise during baking.
Step 3: In another bowl, cream the softened butter until light and fluffy, then add eggs one at a time, mixing thoroughly after each addition.
Creaming the butter incorporates air, which adds to the cake's lightness. Adding eggs one by one allows for better incorporation, ensuring a smooth batter.
Step 4: Mix in the vanilla extract, then gradually add the dry ingredients to the wet mixture, alternating with a few tablespoons of milk if needed until just combined.
Alternating between dry and wet mixes helps maintain the structure and tenderness of the batter. Be careful not to over-mix, which can lead to a dense texture.
Step 5: Spoon the batter into the Twinkie pan, filling each compartment about two-thirds full.
This allows space for the cakes to rise without overflowing. Aim for a smooth top, which contributes to an appealing finished product.
Step 6: Bake in the preheated oven for 18-20 minutes until a toothpick comes out clean.
Baking times can vary based on your oven, so start checking a few minutes early. Proper baking ensures that the cakes are cooked through while remaining moist.
Step 7: Let the cakes cool in the pan for about 10 minutes before transferring them to a wire rack to cool completely.
Cooling in the pan gives the cakes a chance to set, preventing them from breaking. Cooling on a wire rack allows air to circulate, preventing sogginess.
Step 8: While the cakes cool, prepare the filling by whipping the heavy cream with powdered sugar and vanilla extract until soft peaks form.
Whipping the cream correctly is key; over-whipping can result in a grainy texture, while under-whipping won't stabilize the filling properly. Aim for a fluffy, spreadable consistency.
Step 9: Once the cakes are completely cool, use a piping bag to fill each cake with the vanilla cream filling through the small holes made at each end.
Proper filling ensures that each bite is deliciously creamy. A piping bag allows for better control, ensuring even distribution without damaging the cake.
Step 10: Serve your homemade Twinkies fresh, or store them in an airtight container in the refrigerator for up to three days.
Allowing the Twinkies to rest can enhance their flavors, but be sure to keep them covered to retain moisture and softness. This also helps the filling to meld beautifully with the cake.

Experiment with Flavors Beyond Vanilla
While classic vanilla cream filling is a beloved choice, consider experimenting with flavors like chocolate, strawberry, or even coffee for a twist on traditional Twinkies. Adding cocoa powder to the filling or folding in pureed fruits can introduce exciting new tastes that elevate your homemade version. The versatility of this dessert allows for seasonal variations, letting your creativity shine.
Twinkie Toppings and Dipping Options
For an added touch of fun, consider drizzling or dipping your homemade Twinkies in chocolate ganache or colorful icing. This not only enhances the visual appeal but adds another layer of flavor. Nuts or sprinkles can also be sprinkled on top for texture and crunch, making them a perfect treat for parties or special occasions.
Homemade Twinkies: A Family Activity
Making Twinkies from scratch can be a delightful family activity. Children can get involved by helping to mix ingredients and decorate the finished cakes. This not only fosters a love for baking but also creates sweet memories. Plus, sharing the results of your hard work with family and friends adds to the joy, making these treats even more special.
FAQs
What can I do if my filling is too thick?
If your filling is too thick, try folding in a little more heavy cream until you achieve a lighter, pipeable consistency. Ensure you do this gently to avoid deflating the whipped cream.
Can I make the sponge cake chocolate-flavored?
Absolutely! You can substitute a portion of the all-purpose flour with unsweetened cocoa powder to create a chocolate sponge that pairs nicely with the vanilla cream filling.
What if my cake batter appears lumpy?
Lumpy batter can result from under-mixing. Gently mix until the dry ingredients are fully incorporated, taking care not to overwork the batter, as this can affect the texture.
How can I create a more stable filling?
To create a more stable filling, you can add a tablespoon of cornstarch to the powdered sugar, which will help maintain texture, especially in warmer conditions.
Can I use a different type of pan?
If you don’t have a Twinkie pan, muffin tins can work; simply use a piping bag to shape your cakes after baking. The internal texture will remain similar.
Why did my cakes come out too dry?
Overbaking could result in dry cakes. Make sure to monitor baking times and use the toothpick test to check for doneness. Adjust your oven temperature if needed.
Do I have to use unsalted butter?
Using unsalted butter is preferred for controlling the salt content, but if you only have salted butter, you can use it; just omit any additional salt from the recipe.
Conclusion
Homemade Twinkies allow you to experience a nostalgic childhood treat while enjoying the satisfaction of baking from scratch. These delightful cakes are versatile enough to cater to various tastes and preferences.
With a few simple ingredients and a bit of time, you can create a signature treat that not only tastes better than store-bought versions, but also offers the joy of customization. So, roll up your sleeves and get baking!
Recipe Card
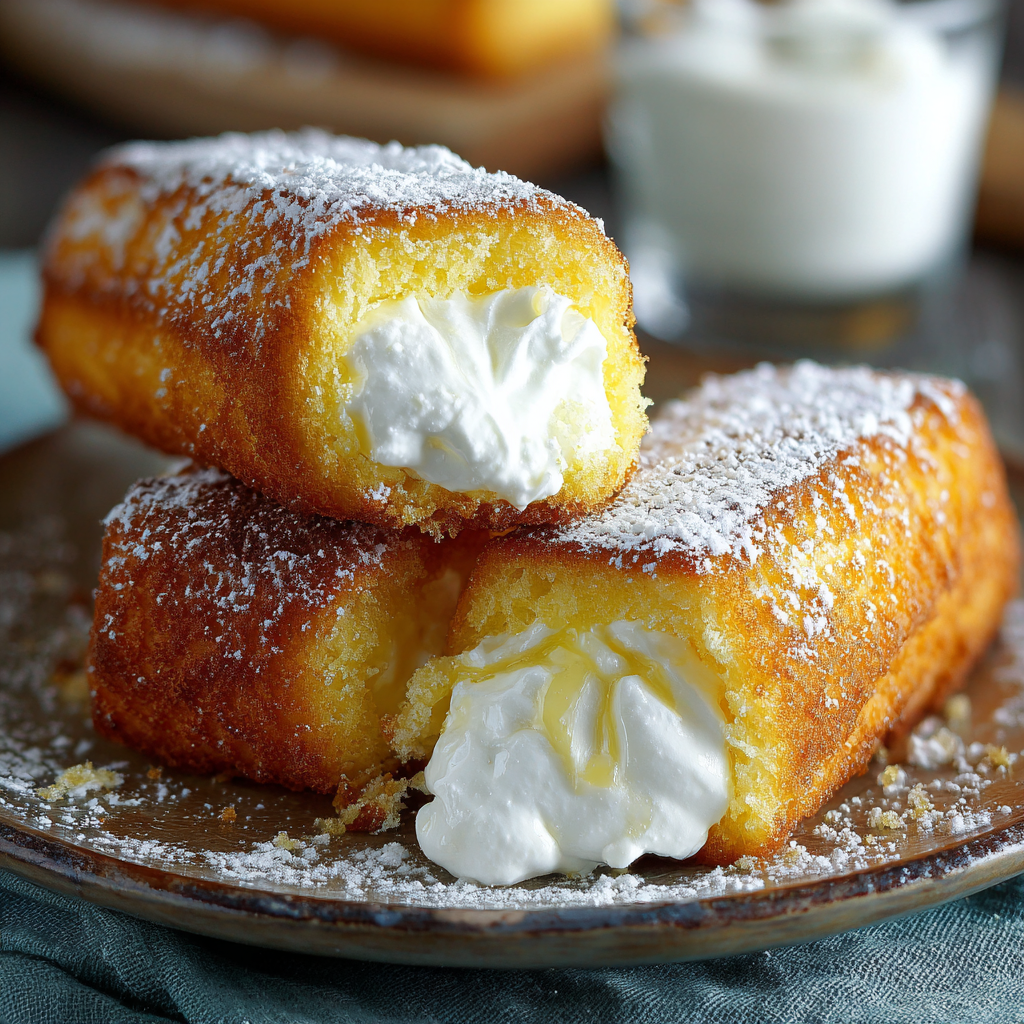
Delight in Homemade Twinkies with Creamy Filling
Ingredients
Method
- Preheat your oven to 350°F (175°C) and prepare a Twinkie pan.
- In a large mixing bowl, whisk together the flour, sugar, baking powder, and salt.
- In another bowl, cream the softened butter until light and fluffy, then add eggs one at a time, mixing thoroughly after each addition.
- Mix in the vanilla extract, then gradually add the dry ingredients to the wet mixture, alternating with a few tablespoons of milk if needed until just combined.
- Spoon the batter into the Twinkie pan, filling each compartment about two-thirds full.
- Bake in the preheated oven for 18-20 minutes until a toothpick comes out clean.
- Let the cakes cool in the pan for about 10 minutes before transferring them to a wire rack to cool completely.
- While the cakes cool, prepare the filling by whipping the heavy cream with powdered sugar and vanilla extract until soft peaks form.
- Once the cakes are completely cool, use a piping bag to fill each cake with the vanilla cream filling through the small holes made at each end.
- Serve your homemade Twinkies fresh, or store them in an airtight container in the refrigerator for up to three days.
Notes
Additional serving suggestions: pair with a crisp salad, garlic bread, or roasted seasonal vegetables for balance.
For make-ahead, prep components separately and assemble just before heating to preserve texture.
Taste and adjust with acid (lemon/vinegar) and salt right at the end to wake up flavors.